Gitlab guide
This quick GitLab guide will walk you through essential steps like adding your SSH key, creating a new project, pushing code, and making pull requests. It's perfect for developers who want to get started with GitLab quickly and efficiently.
1. Gender SSH key and push on the Gitlab
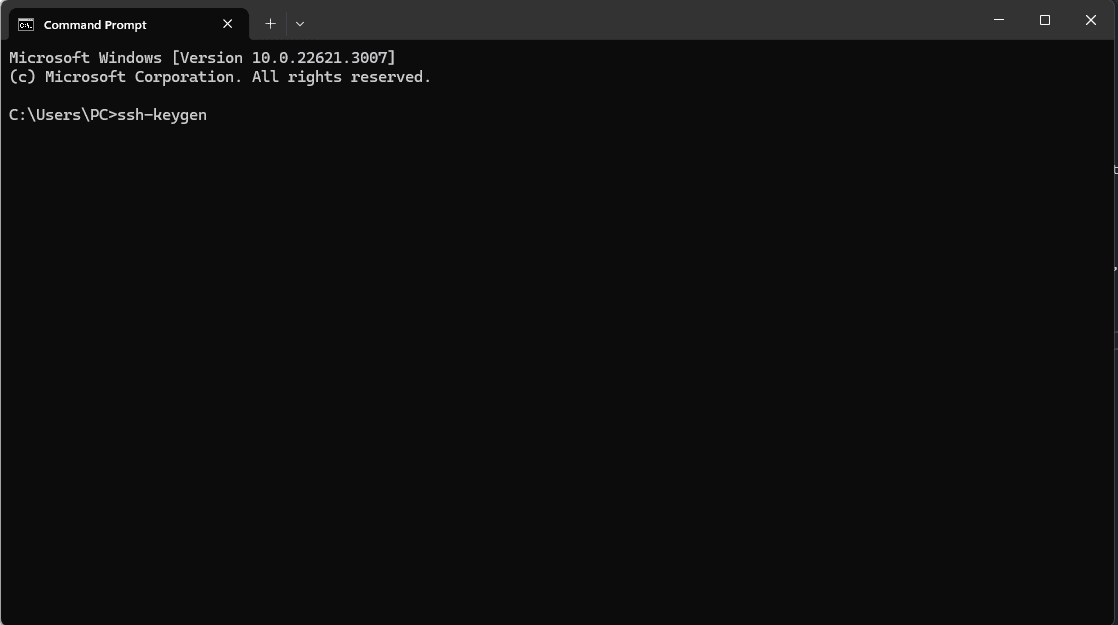
On the local computer, open terminal (Cmd/Powershell on Window, Bash shell on Linux), run this command:
bashssh-keygen
When you run the command above, if you're prompted with any questions, just press Enter to skip through them.
Once the command finishes, it will generate a .ssh folder in the root directory of the currently signed-in user on your system.
For example on the Window11:
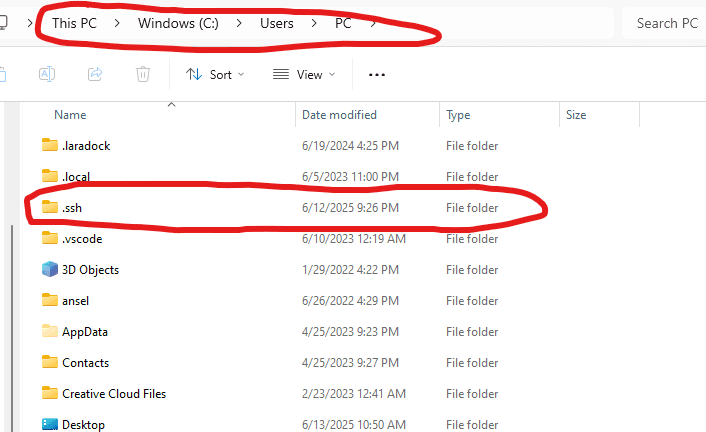
Open this folder, and open file id_rsa.pub with text editor (Notepad on Window), copy the value.
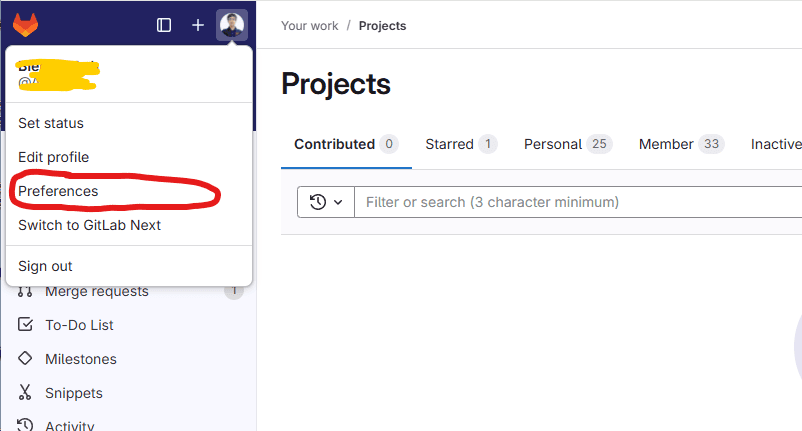
Now let’s go to GitLab and sign in to your account. Go into the Dashboard page. Click on the Avatar button, then click on Preferences button:
Click on the SSH Keys button on the Left navigation. After that, click on the Add new key button
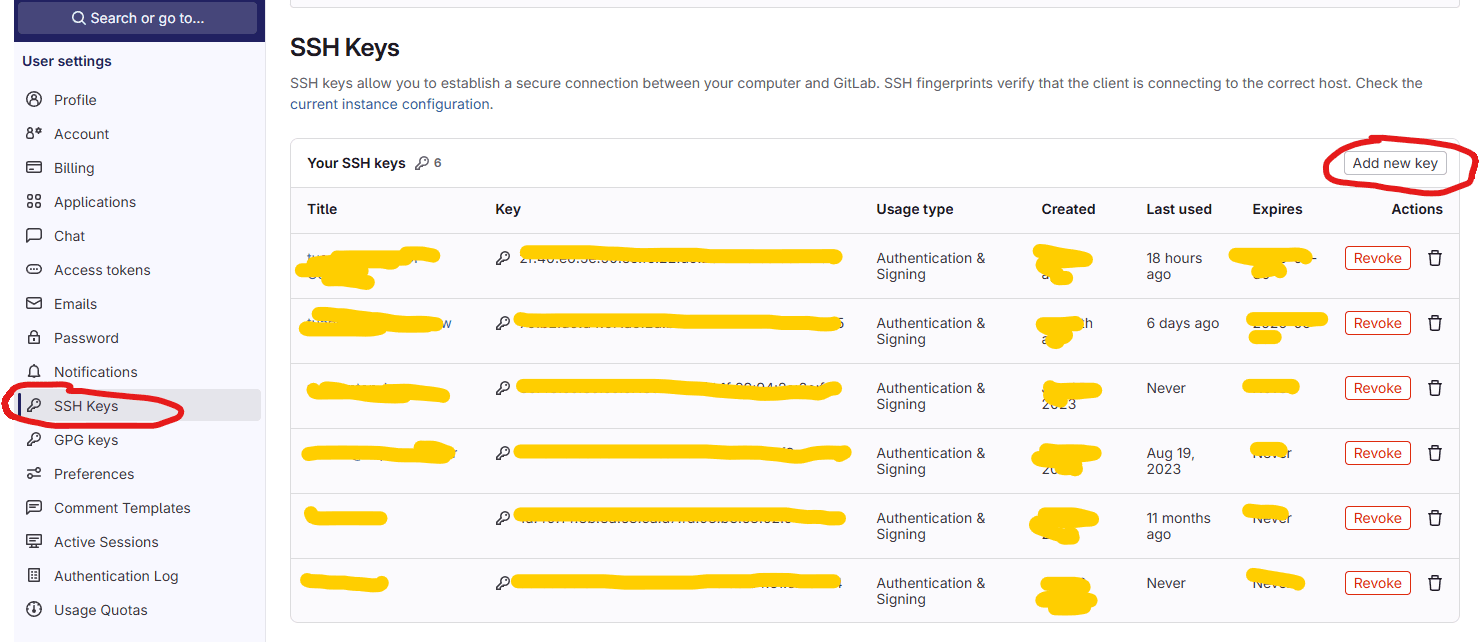
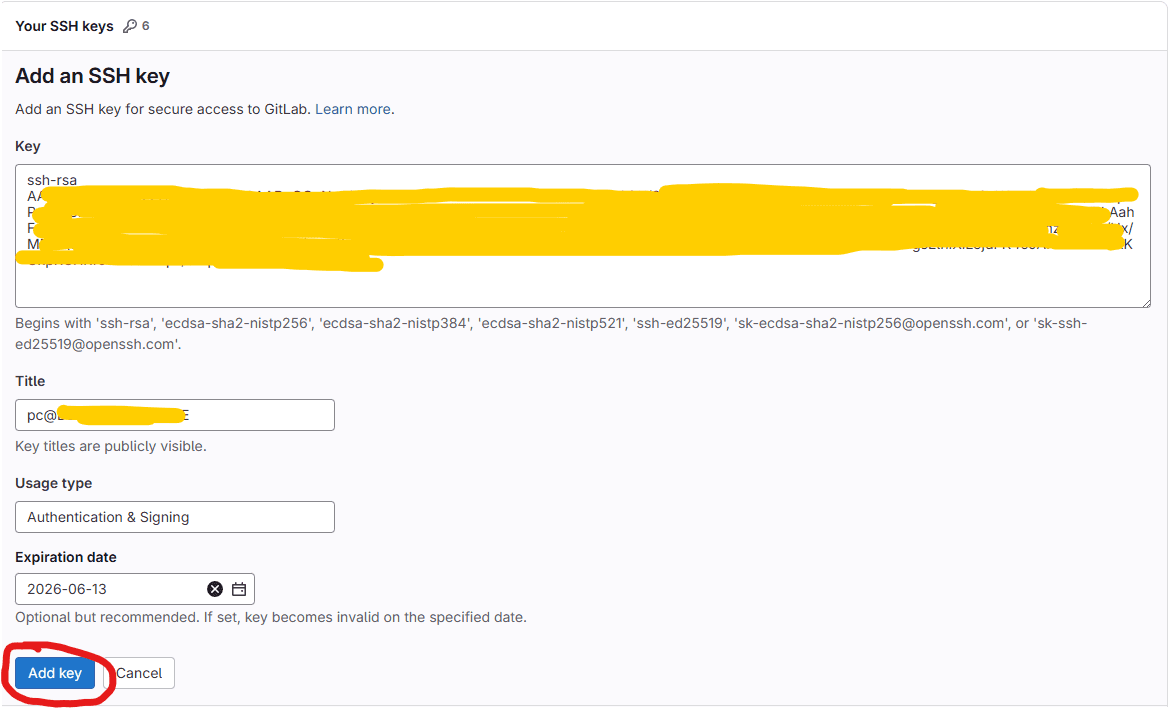
Fill the key value that you have on previous step on the text field, fill the name and set the expire time. Then click Add key button:
Done! You've successfully set up the SSH key on both your local machine and GitLab. Now you can clone, pull, or push code without having to enter your GitLab credentials each time (unlike using HTTPS).