How to Install and Use Husky for Git Hooks in Your Project
Husky is a tool that automates Git hooks, helping you run tests, lint code, and enforce best practices before commits. It’s easy to set up and improves workflow efficiency.
Why we need it:
- Automates Git Hooks – Run scripts before commits, pushes, or merges effortlessly.
- Ensures Code Quality – Enforce linting, formatting, and tests automatically.
- Prevents Bad Commits – Stop commits that don’t meet project standards.
- Seamless Integration – Works with ESLint, Prettier, Jest, and other tools.
- Improves Team Consistency – Ensures all team members follow the same rules.
- Easy to Set Up – Simple installation and configuration with package.json.
1. Install dependencies
Run the following command to install Husky and other necessary dependencies:
shellyarn add --dev husky
or
shellnpm install --save-dev husky
2. Enable Husky
Initialize Husky in your project:
shellnpx husky init
This will create a .husky directory with a pre-commit hook.
3. Create pre-commit and pre-push files
3.1 Create a file pre-commit in the .husky folder:
shell#!/bin/sh
npm run lint && npm run format-check
All commands in pre-commit file will be run before git commit run. If all commands run done, the git commit will be run, if not the commit not be run.
3.2 Create a file pre-push in the .husky folder:
shell#!/bin/sh
npm run typecheck && npm run dep-audit && npm run test
All commands in pre-push file will be run before git push run. If all commands run done, the git push will be run, if not the push command not be run.
4. Update the package.json file:
This code will ensure that someone who clone your source code from the remote repository, when they install dependencies, the initialize husky command will be automatic installed.
json{
  "scripts": {
    "prepare": "husky install"
  },
}
5. Test pre-commit and pre-push:
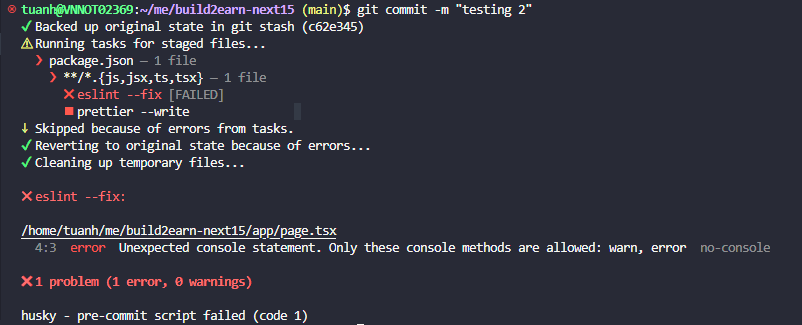
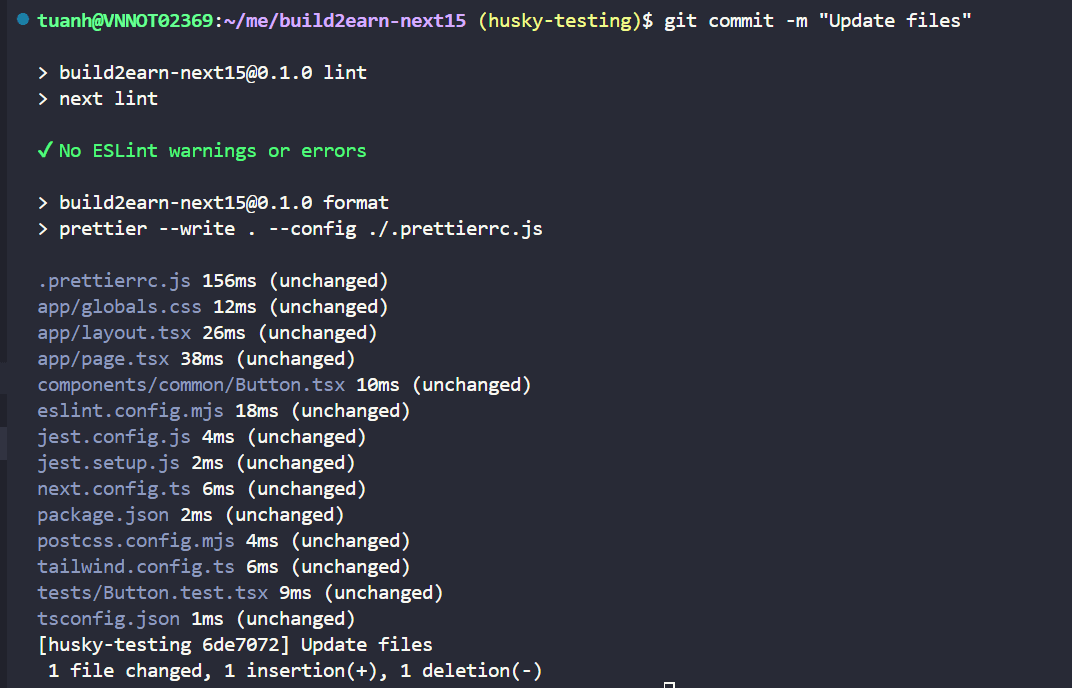
You can create an new test branch -> change code -> commit the changed code. You will se before git commit, the terminal will run 2 commands: npm run lint, npm run format (2 commands from the pre-commit file in .husky folder).
If lint and format command success, the commit command will be run. Otherwise, if not success, the commit command will be not executed.
After that, you can push the changed codes to the remote repository, you will see, before push command, the terminal will run the command: npm run test (this command from the pre-push file in .husky folder).
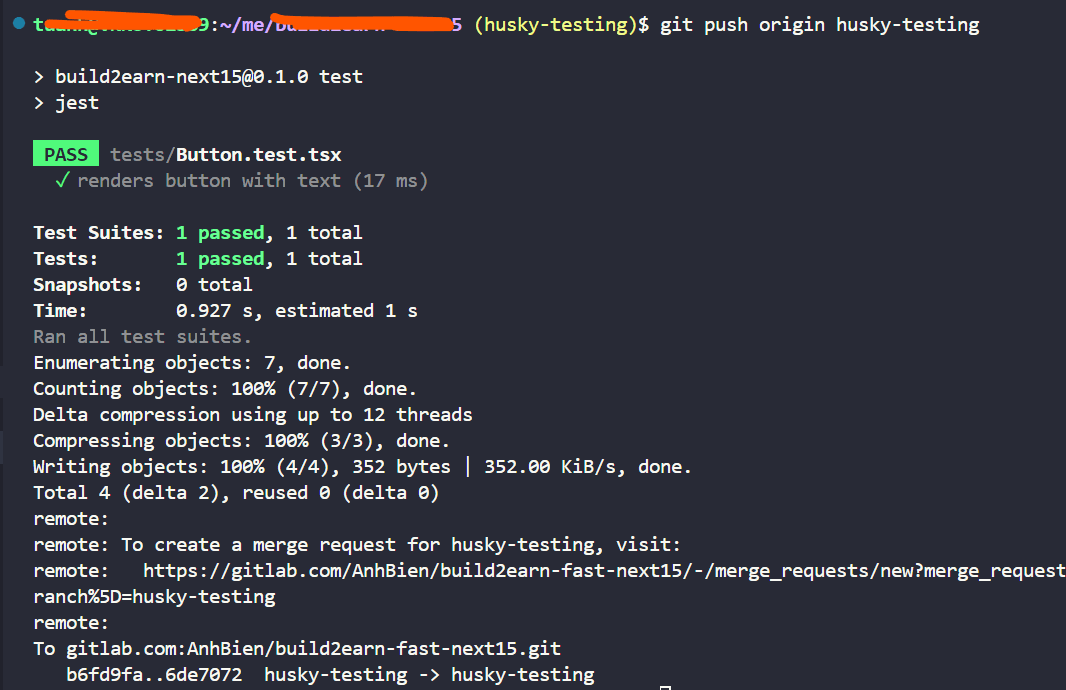
If test command success, the push command will be run. Otherwise, if the test command is not success, the push commit will be not pushed.
Notes
- If you do not have the lint, format-check and test command, you can prefer my docs:
- If you want to passed the husky checking (pre-commit, pre-push), you can add "--no-verify" after git commit and git push commands:
git commit -m <message> --no-verify
git push origin <branch> --no-verify
6. Optional: lint-staged, quick-format (only for large source code)
If your codes is scaled up, the source have a lot of files, each time you run yarn lint and format check, it takes so much time, because it scans over all files. But when you works on the GIT, each time you want to commit code, you only need run lint and format for all staged files (rest files are okay, not need to run). So we will use the lint-staged to improve it:
6.1 Install dependencies
shellyarn add --dev lint-staged
or
shellnpm install --save-dev lint-staged
6.2 Update the package.json file
json{
  "lint-staged": {
    "**/*.{js,jsx,ts,tsx}": [
      "eslint --fix",
      "prettier --write"
    ]
  }
}
6.3 Update pre-commit file
shell#!/bin/sh
lint-staged
So now when you use git commit command, the lint staged will run for only staged files. You can add the console.log (you added the error rules in eslint config file) then commit, you will get the error like that: