02 Build MVP fast
Setup your app brand
After downloading and opening the source code, it’s time to customize it to match your app’s brand. In this step, you’ll update things like the folder name, meta info, brand colors, logo, and favicon to make the app truly yours.
1. Change name of folder source code
To keep things consistent — including the app name and the name of the source code folder — and to make it easier to upload the project to GitLab (where we’ll store our source code on the server), we should rename the source code folder now.
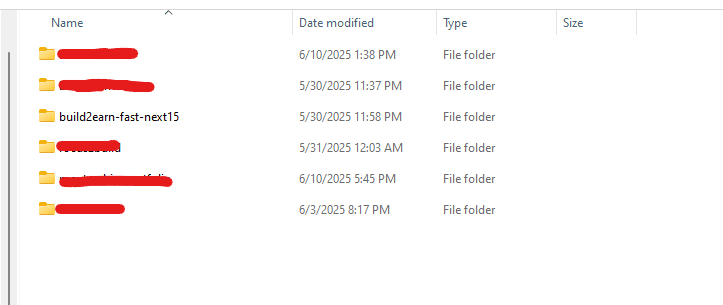
Open the explorer where your source code is located, and rename the source code folder based on your app’s name.
For example: my-app, testing-app, my-idea-app, etc.
Note: Use lowercase letters and separate words with hyphens (-).
2. Change your website language
Open source code by VS Code, open file app/layout.tsx, change lang attribute of html tag
jsx<html lang="en">
  ...
</html>
If your website is written in English and intended for English-speaking users, enter 'en'. Similarly, if it’s written in Vietnamese and meant for Vietnamese users, enter 'vi'.
jsx<html lang="vi">
  ...
</html>
You can look up and find the HTML language code for your country at this link.
3. Update .env.local file
Please add some values on the .env.local file (we created in the previous page)
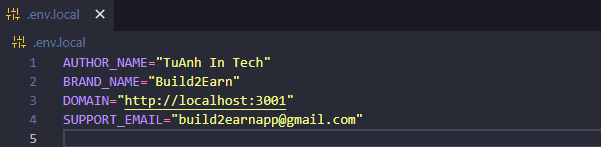
These values will be applied to all source code.
4. Change meta info in website
Meta information in HTML—like title, description, keywords, and author — helps describe your web page. It improves SEO, supports how your site appears in search results, and provides useful info to browsers and social media platforms.
Open file app/layout.tsx, change title, description, keywords and author.
jsxexport const metadata: Metadata = {
  title: "Build2Earn Sample Code",
  description: "Build2Earn Sample Code",
  keywords: "nextjs template code, sample code, build2earn, tuanhintech",
  authors: { name: appConfig.AUTHOR_NAME, url: appConfig.DOMAIN },
  creator: appConfig.AUTHOR_NAME,
  openGraph: {
    title: "Build2Earn Sample Code",
    description: "Build2Earn Sample Code",
    url: appConfig.DOMAIN,
    siteName: "Build2Earn Sample Code",
    images: [
      {
        url: `${appConfig.DOMAIN}/images/shortCourses/fullstack-nextjs.png`, // change your image URL here
        width: 1200,
        height: 630,
        alt: "Khóa học lập trình web fullstack - Từ cơ bản đến nâng cao",
      },
    ],
    locale: "en_US",
    type: "website",
  },
  twitter: {
    title: "Build2Earn Sample Code",
    description: "Build2Earn Sample Code",
    card: "summary_large_image",
    creator: "@tuanhintech",
  },
};
- Title: Displays the page’s name in browser tabs and search engine results.
- Description: Summarizes the content of the page for search engines and users.
- Keywords: Lists relevant words to help search engines understand the page topic (less commonly used now).
- Author: Specifies the name of the person or organization that created the content.
- openGraph: Open Graph meta tags control how your app appears when shared on social media platforms like Facebook, LinkedIn, or Zalo.
- Twitter: Twitter meta tags define how your app’s content is displayed when shared on Twitter, including the title, description, and preview image.
5. Change brand website color
The brand color is the primary color that represents your app’s identity. It’s used across the UI to create a consistent and recognizable look and feel.
Open file tailwind.config.ts then change primary color of website (you can use the hex color)
jstheme: {
  extend: {
    colors: {
      primary: "#f59e0b",
    },
  },
},
After changing the color, all components—like background colors, text colors, and more—will reflect the new color you selected.
Your app now has a consistent brand color that highlights your identity and gives it a more professional look.
6. Change website logo
Now let’s move on to update your app’s logo, which is located on the left side of the navigation bar.
Open folder public/images change app-logo.png image file.
I recommend you can use Canvas to create the app logo image.
Notes: This is just a quick draft of your app’s logo. We’ll refine and improve it before the product launch.
7. Change website fav.icon
A favicon.ico is a small icon that appears in the browser tab next to your website’s title. It helps users recognize and differentiate your site among multiple open tabs. Adding a favicon improves your site’s branding and gives it a more polished, professional look.
To change fav icon, change file app/favicon.ico in source code.
I recommend you can use the website to convert image to favicon.
8. Change font family
You can change the font style to match your application’s branding. If the default Inter font works well for you, there’s no need to change it.
If you want to change, open file app/layout.tsx, and import font type from "next/font/google":
jsximport { Inter } from "next/font/google";

const inter = Inter({
  subsets: ["latin"],
  display: "swap",
});

<html lang="en">
  <body className={`${inter.className} antialiased`}>
    ...
  </body>
</html>
For example, if you want to use font Geist:
jsximport { Geist } from "next/font/google";

const geist = Geist({
  subsets: ["latin"],
  display: "swap",
});

<html lang="en">
  <body className={`${geist.className} antialiased`}>
    ...
  </body>
</html>
You have successfully completed the setup 🎉.