Setup Google authentication
This guide will walk you through setting up Google Sign-In for your app using Google Cloud Console. You’ll create a project, configure OAuth 2.0 credentials, and connect them to your application. By the end, you’ll be able to let users sign in securely with their Google accounts.
1. Setup Google cloud environment
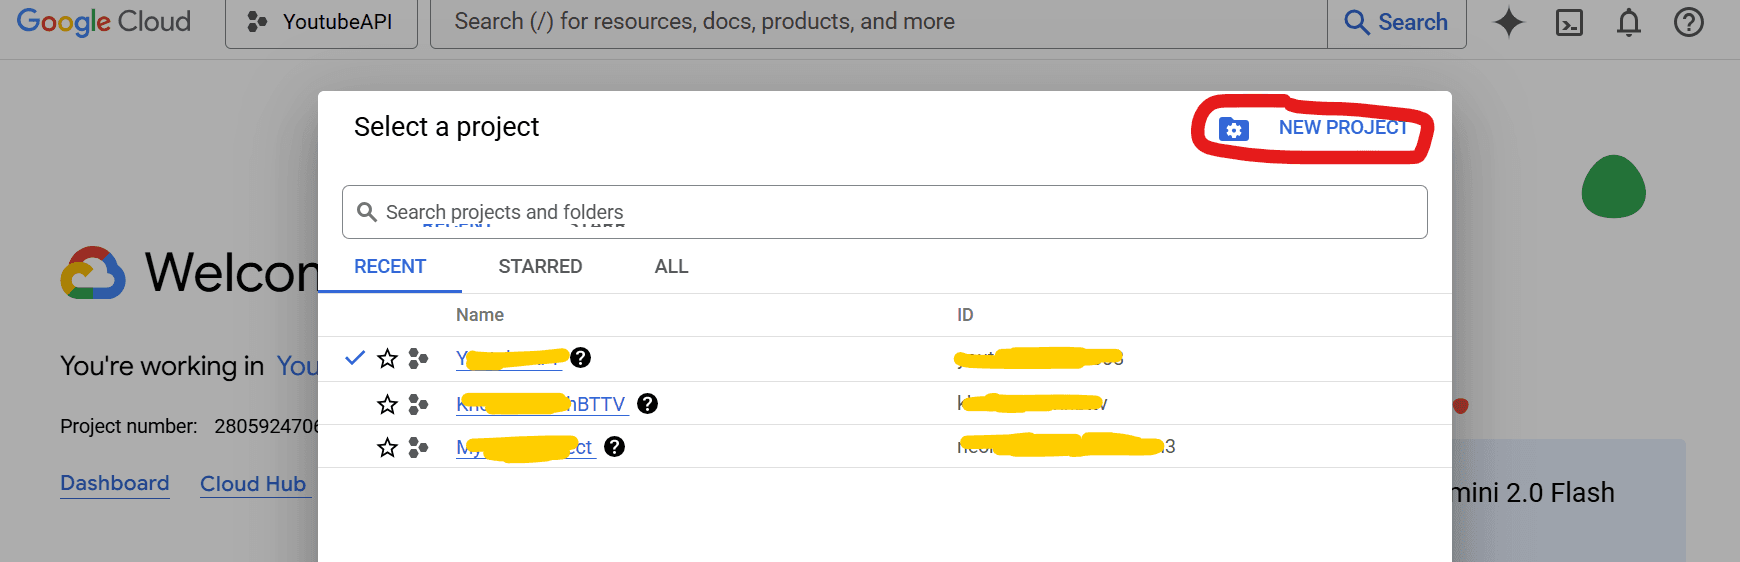
Signin to Google console cloud, then click Project button

You can select an existing project or create a new one for your app. If you are building a new app, you’ll need to create a new project, as each app corresponds to a single project.
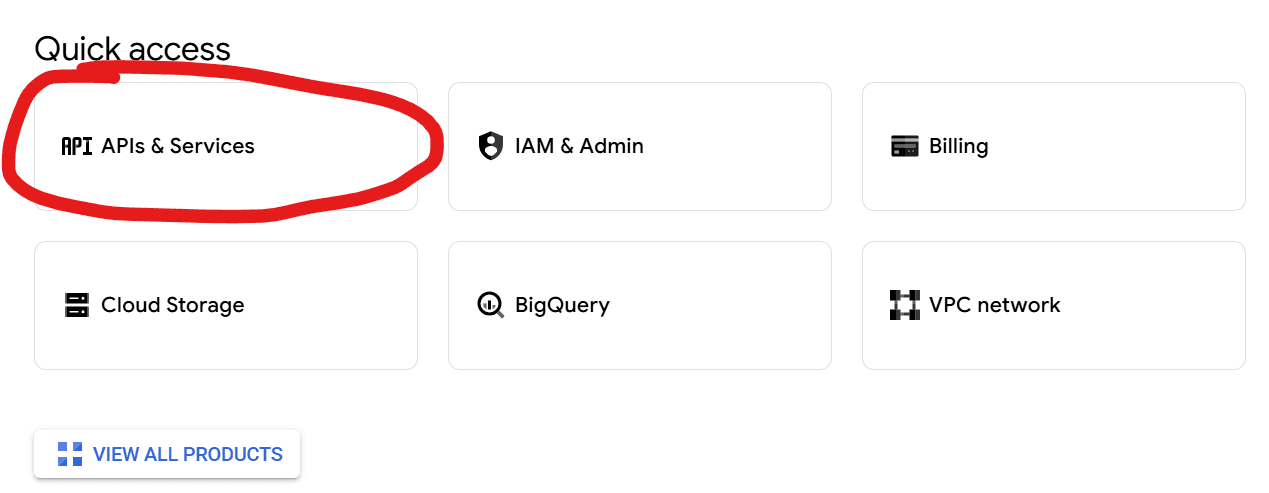
After selecting or creating project, you scroll down then choose the API & Services options
Click on the Credentials link on the left navigation, then click on Create credentials button on the top navigation:

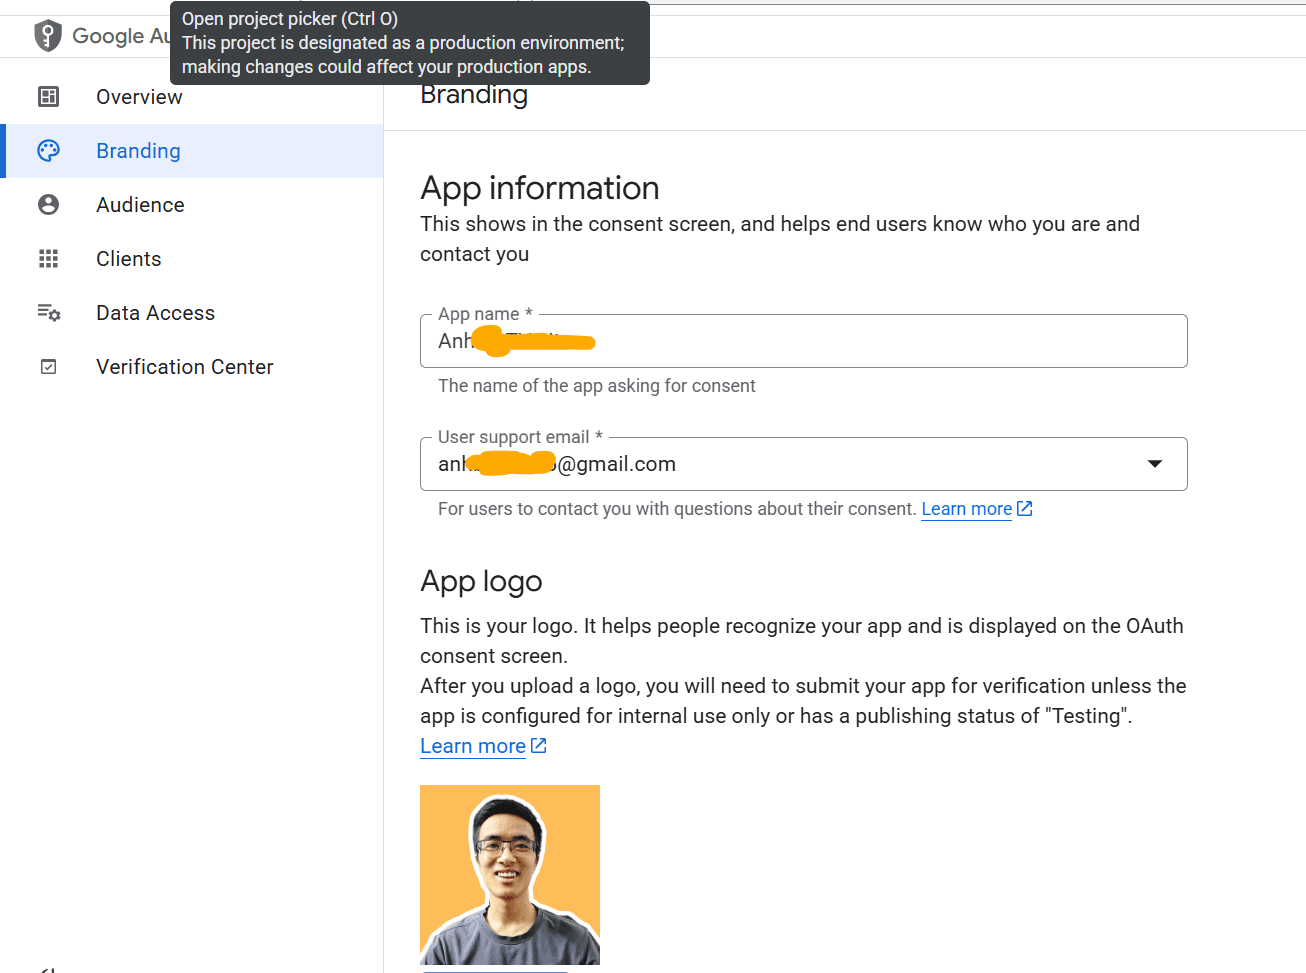
After create OAuth client ID, you will see the waring "To create an OAuth client ID, you must first configure your consent screen", it means we need config the name, color, branding, ... for consent screen which after user click on the Google Signin Button (on your sign in form).
Click on the Configure consent screen button to config. You need add the App name, email, and domain, ...

At the same page, click on the Clients button on the left navigation
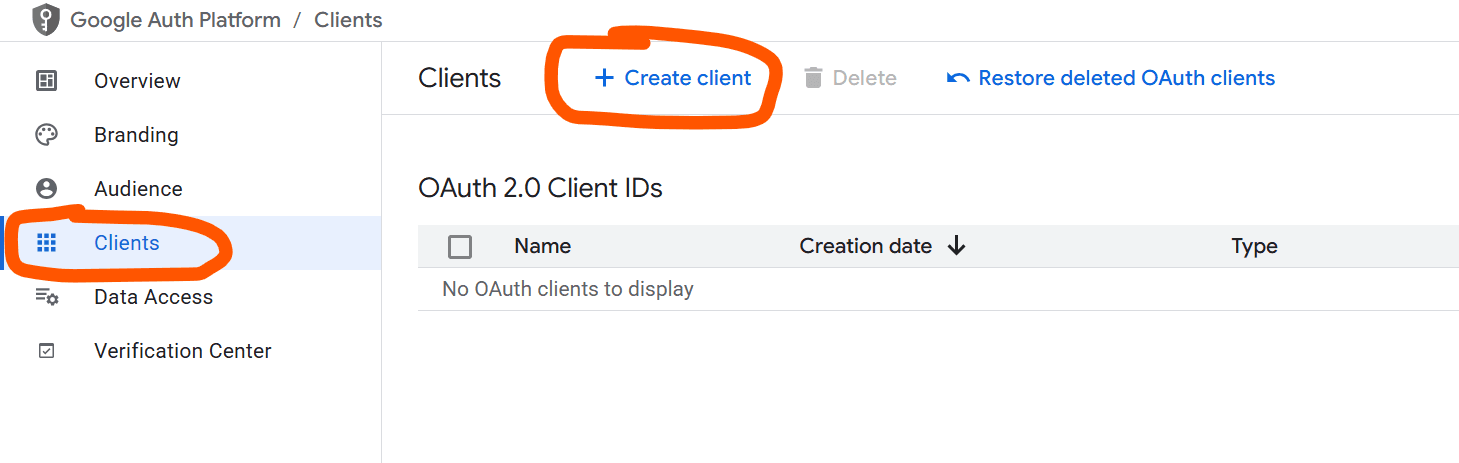
Then click on the Create clients button, then choose "Web application" option. Then name for client, and add the Authorized JavaScript origins
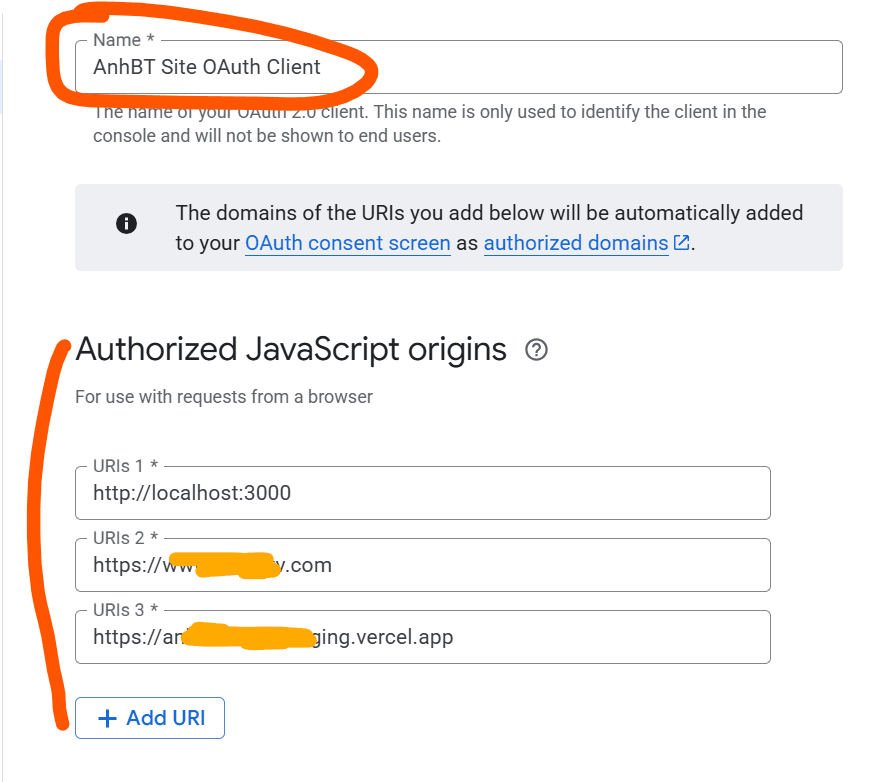
Then config the Authorized redirect URIs
Just same with Authorized JavaScript origins but add /api/auth/callback/google at the end URL:

After all steps, we done for setup OAuth2 in Google Cloud, now we just copy the client ID and client secret into the .env.local file.
You can get two values on the right site of current page.
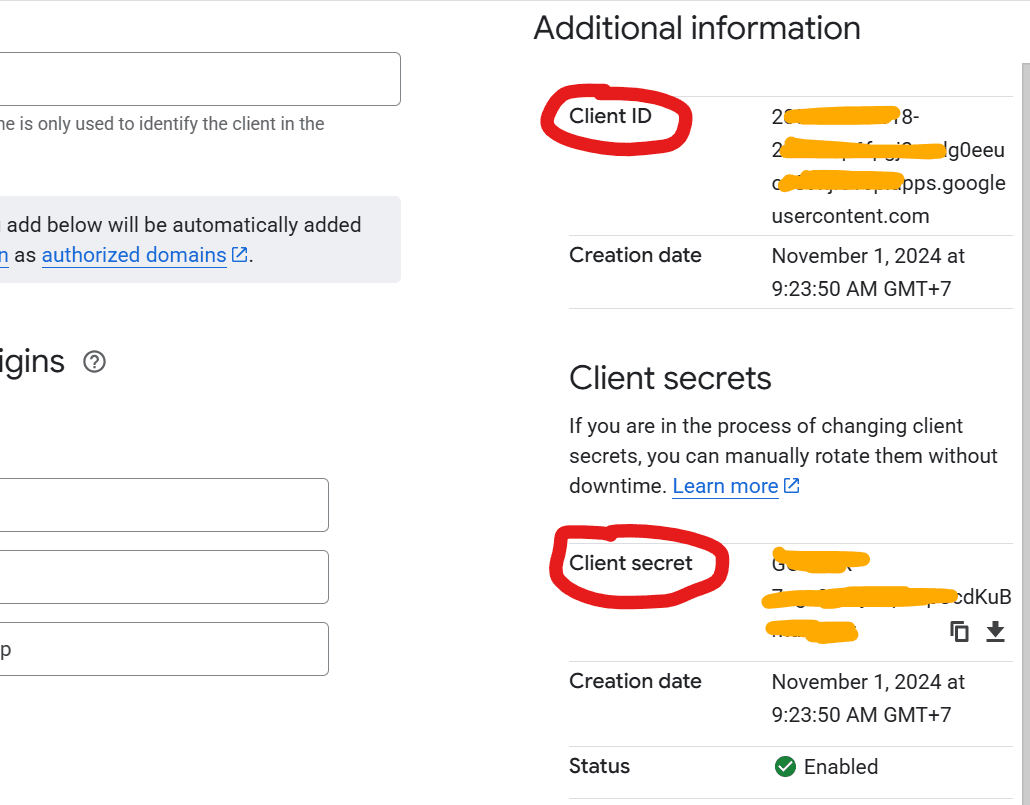
The .evn.local file like that:
jsonGOOGLE_CLIENT_ID="xxxxxxxxxxxxxxxxxxxxxxxxxxxxxxxxxxxxxxxxxxxxxxxxxxxxxxx"
GOOGLE_CLIENT_SECRET="xxxxxxxxxxxxxxxxxxxxxxxxxxxx"
Notes
Do not share the GOOGLE_CLIENT_SECRET value with anyone, as it is sensitive and must remain private.
Nice, we all done to config the OAuth2, Consent Screen in Google Cloud!
You can find the setup detail guide for Google Authentication in the following my documentation link.
2. Check everything work
You can start your Next.js server by command:
bashyarn dev
On Homepage click on the sign-up button on the top navigation. On Signin form, click on the Google signin button:
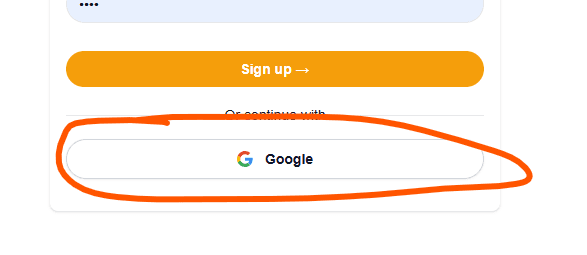
Then the Google signin page will be shown:
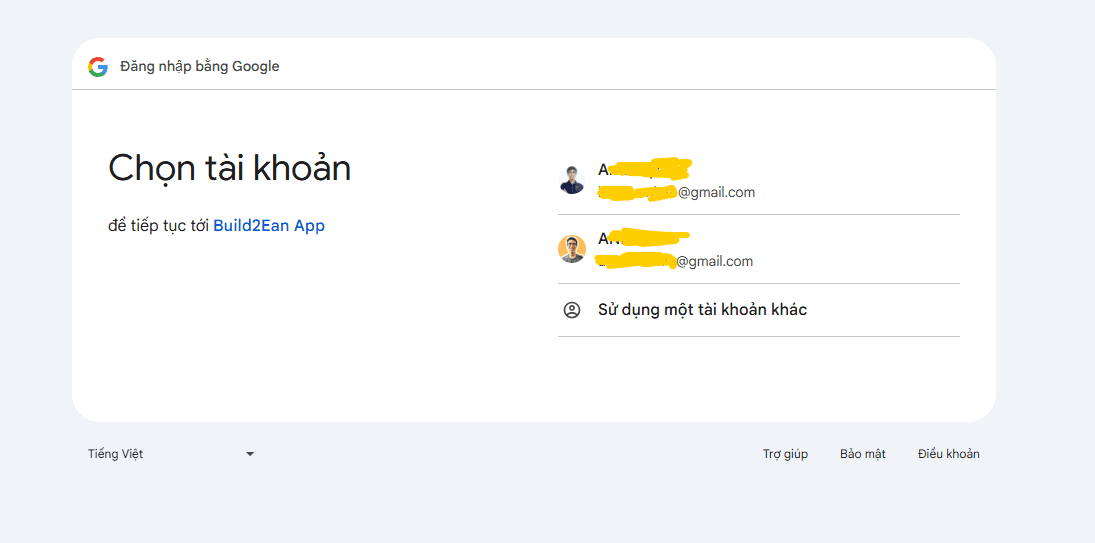
You have successfully completed the setup 🎉.